Introduction

This is the user manual for the Pilot Gear Watch Navigation App (PgW Nav). This application helps you find the best solution for your rerouting in case of bad weather or
voluntary decision. Find the nearest airport, get its weather information, radio communication frequencies and location directly on your watch!

Identification

Version

This is the version 2.0 of this manual.

Change log

VersionDate of issueHighlights
1.0Mar. 28th, 2023Creation of this new version of the manual
2.0Dec. 22nd, 2023

Add new features :

  • Keyboard with numbers to support airports having numbers of their code
  • New METAR evolution page
  • Change the time zone local or UTC
  • New presentation of the pages

Disclaimer

WARNING ! This application will never be a primary navigation device. It has to be used as a complementary source of information for your decision-making process.
Never rely on the information provided by this application without reconciling it with another official source of information.

User interface

The App accepts only the touch screen and the rotating bezel to interact with the user.

On Galaxy Watch models, the hardware buttons of the watch are only used to quit the app. Two behaviors exist :

  • By pressing the upper button, the user quits the app and the app is paused. Next time you run the app, the execution is resumed very quickly.
  • By pressing the lower button, the user quits the app and the app is totally stopped. Next time you run the app, the execution is started from the beginning. It may take few seconds or few minutes to start.

On the touch screen, several touch modes are managed:

  • Single tap: Used to access airport or navaid data. Opens an airport information page or navaid information page.
  • Double tap when HSI mode is active: change the course with the bezel
  • Swipe bottom to top: Opens the settings menu.
  • Swipe right to left: Opens the favorites page.

This watch is designed to be controlled by tapping the screen or turning the bezel of the watch. Buttons are useless (just to quit the app).

Geolocation

The app requires the location information to work. The app won’t start if the location is not available. You have 2 solutions:

  • Use the GPS sensor of the watch
  • Use the location provided by your smartphone

The second solution is far more faster and reliable than the first one. The GPS sensor may take up to 15 minutes to compute your current location (the time of the initialization may vary). Your phone can establish your location in few seconds (because it uses its internet connection to get the almanac instead of the satellites signals).

Be sure to activate one of these two solutions before launching the app. Otherwise, you will see this screen (see the screenshot on the right).

Check these following pages if you experience some issues with the GPS initialization :

How to set GPS on Samsung Galaxy Watch?

Manage app permissions on your Samsung smartwatch

Navigation view

The layers

The navigation view is a navigation display composed of 5 layers (from background to foreground):

  • Moving ground map
  • METAR map
  • airports and navaids map
  • Navigation instruments
  • flight parameters

The compass

All around the screen, the compass shows the current heading and the major angles: one mark every 5 degrees. one value every 30 degrees.

The North reference

The North reference of the main view can be either the True North or the Magnetic North. The choice can be made with the settings menu.

When the reference is the Magnetic North, the app uses a computed and static model of the magnetic variation to compute the magnetic heading with the computed magnetic variation at the current location.

Maps are built using the Mercator projection. The scale varies with the latitude. The range values shown in this manual are only indications (quite correct for latitudes between 50°S and 50°N). The range values may differ on the navigation view depending on your current position. The higher your latitude is, the greater the scale is.

The ranges

The navigation view has 4 different ranges which can be changed by turning the bezel of your watch (see how to use the bezel) :

  • 40Nm
  • 20Nm
  • 10Nm
  • 5Nm

These are approximate values for latitudes 48°N or 48°S because the scale depends on the current latitude. Actual range values are displayed in magenta at the right middle part of the screen. Dotted circles show the intermediate ranges.

Maps are built using the Mercator projection. The scale varies with the latitude. The range values shown in this manual are only indications (quite correct for latitudes between 50°S and 50°N). The range values may differ on the navigation view depending on your current position. The higher your latitude is, the greater the scale is.

The markers

For all ranges, the view will display small cyan arrows all around the compass to indicate that airports are in the vicinity of the region but outside the selected range (1 arrow per airport). So it invites you to increase the range if you’re currently flying in a region where no airport is visible in the selected range.

In the screenshot on the right, the markers are the 2 little blue arrows on the bottom left of the view.

The opacity of the arrow depends on the distance of the airport. The less opaque the arrow is, the further the airport is. Their position on the compass gives you the direction.
To ease the readability of the view, the arrows are blinking. They appear every 5 seconds.

The ground map

The ground map is composed of the following layers:

  • Countries boundaries,
  • Major roads,
  • Secondary (minor) roads,
  • Railways,
  • Land usage (natural parks, airports, forests, …)
  • Terrain elevation

Each layer can contain many graphical objects. So if performance decreases, you can hide the layers you want for some ranges. By default, the land map is hidden and most of the layers are hidden. Go to the settings menu to activate the land map and select the layers you want to see. Check the performance of the navigation view and correct the settings if needed.

They can be displayed using 2 different styles:

  • Day style with bright colors for the terrain
  • Night style with dark colors for the terrain

The app can also switch automatically from one theme to another using the local daylight hours.

Use the settings menu to select the style.

The land map requires a permanent internet connection to be displayed. Map data is provided dynamically by Mapbox. Map data is not managed nor hosted by Aerotools. See the privacy policy page. The land map covers the entire world.

Flight parameters

Four major flight parameters can be displayed on the navigation view. The parameters are printed with a large font with a moving gauge underneath. These parameters are:

  • Top/Right:Your ground speed in knots by default (unit can be changed. See Changing the units)
  • Top/Left:The current atmospheric pressure in hPa (unit can be changed. See Changing the units)
  • Bottom/Left:Your altitude in feet given by the GPS (unit can be changed. See Changing the units)
  • Bottom/Right : The current battery level in percentage.
In the middle of the view, two parameters are displayed :
  • Top : Current UTC time in the format HH:MM
  • Bottom: The estimated remaining time to destination (ETA) in the format HH:MM (only when the GOTO mode is ON. See GOTO information in this manual.)

    Color of the flight parameters can be changed with the settings menu. Up to 7 colors are available :

    Airports and navaids map

    The airports and navaids map is displayed over the land map. It shows :

    • the location of the airports having an ICAO code only. It provides also all the data related to the airports you can see in the airport information pages and the magnetic variation for magnetic heading computation.
    • the location of the following navaids: VOR, VOR/DME and NDB

    The map doesn’t requires a permanent internet connection to be displayed. It is downloaded only if needed when you start the app then stored inside the watch. See the Airports and navaids map section of this manual for more information. The map doesn’t cover the entire world. See the list of the countries in this section.

    Symbols used in the map for the airports

    Civil airports are displayed with blue circles. Restricted airports are displayed with red circles.

    • Civil
    • Restricted

    Inside the circles, runways are shown with lines. The color of the lines gives the nature of the runway:

    • paved (gray color)
    • unpaved (green)

    Runways are displayed with their true (QFU+magnetic variation) or magnetic orientation depending on the current North reference. Parallel runways are not displayed. Only the orientation matters in the navigation view.

    Symbols used in the map for the navaids

    Navaids are displayed with purple symbols

    • VOR,
    • VOR-DME
    • NDB
    VOR
    VOR-DME
    NDB

    Labels over the airports symbols

    Along the symbol, some labels are displayed:

    • The last 2 characters of the code of the airport. Example: For airport LFPZ, only ‘PZ’ is displayed. This reduces the size of the label for a better readability of the view
    • The distance in Nm (unit can be changed. See Changing the units). If the ground speed is available, the time to destination in minutes is also displayed right after the distance.
    • The bearing (true or magnetic north reference depending on the current north setting)

    When range is 40Nm, only the 2 last characters of the code are displayed (Short code).

    When range is 20Nm, these values are displayed alternatively inside the same label to minimize the space occupied by each airport in the view. Values are shown during
    few seconds in this order: Short code->Bearing->Distance->Time to destination

    Tap the labels of an airport to open the airport information pages. These pages are described in the chapter airport information pages.

    When range is 40Nm or 20Nm, airport displayed in the inner and middle areas of the map are dimmed to enhance the readability of the airport.

    Labels over the navaids symbols

    Along the navaid symbol, some labels are displayed :

    • It shows the ID of the navaid. Color is purple.
    • The distance in Nm (unit can be changed. See Changing the units). If the ground speed is available, the time to destination in minutes is also displayed right after the distance.
    • The bearing (true or magnetic north reference depending on the current north setting)

    Favorite items

    You can define a list of favorite items (see Manage your favorite items). All favorite airports or navaids have their data displayed in yellow on the navigation view.

    METAR map

    The METAR map is a map drawn underneath the airports map and over the land map. It shows the flight category of all the visible airports in the main view with colored halos placed under the airports symbols.

    It moves as the map moves. The radius of the halo is linked to the visibility reported by the METAR: the greater, the better.

    By default, the METAR map is not active. Go to the settings menu to activate this map.

    The flight categories

    4 major colors are used every where in the application to represent the flight category associated to an airport. These colors are: lime, teal, orange and red.

    • VFR : Visibility > 8km and ceiling > 3000ft
    • MVFR : Visibility ≥ 5km and ceiling ≥ 1000ft
    • IFR : Visibility ≥ 1.7km and ceiling ≥ 500ft
    • LIFR : Visibility < 1.7km and ceiling < 500ft

    This colored map requires an internet connection. The watch must be connected through its WIFI interface or bluetooth interface paired with your smartphone.
    You may notice a small lag between the movement of the navigation map and the movement of the METAR map. This is due to the internet connection latency.

    When the connection is lost, the METAR map is hidden.

    The meteorological information is provided by Aviation Weather Center (NOAA). The data is loaded when you request an information based on this and when the application cache contains only obsolete data.

    For Australian airports, when the messages are not available on the NOAA database, the weather status is not displayed on the colored map but you can have full meteorological data in the AD information pages.

    How to use the rotating bezel to change the main view ?

    Turning the bezel changes the range of the navigation view but it can also change the display by modifying the opacity of the layers on the view.

    • Turn the bezel clockwise, decrease the range in this order: 40Nm->20Nm->10Nm->5Nm
    • Turn the bezel counter-clockwise, increase the range in this order: 5Nm->10Nm->20Nm->40Nm
    • If you continue to turn the bezel counter-clockwise when the range is 40Nm, you will dim the airports map to make the flight parameters layer appear progressively. The airport layer can be totally masked.
    • If you continue to turn the bezel clockwise when the range is 5Nm, you will dim the airports map to make the land map appear brighter. The airport layer can be totally masked.

    The GOTO layer is never affected by the bezel. When the GOTO mode is active, this layer will always be visible.

    Airports and navaids maps

    Airports and navaids data source

    The airports and navaids map loaded by the app at start-up is composed of 9 tiles (3 tiles x 3 tiles – see the yellow tiles on the picture on the right). Each tile covers 10 degrees in longitude (600Nm at the Equator) and 10 degrees in latitude (600Nm). So, when the app starts, the view can be as large as 1800Nm x 1800Nm.

    When the application starts, as soon as the location is determined by the watch, it checks if the required tiles are available in the memory of the smartwatch.

    If some tiles are not available, the app will try to download them. If some tiles are available, the app will check if an update exists on the AEROTOOLS server or not.

    Airport and navaids maps tiles are only made and provided by aerotools.fr. The application directly downloads them from our server. You DON’T need to download them by yourself.

    The airports and navaids map contains the airports, the airfields, the VOR, VOR-DME and NDB that are defined in the following databases:

    Map updates

    The airports and navaids map tiles are updated twice a year. The application checks the tiles version only when it starts. If a new version of a tile is available on our server, the app will download the new version immediately if the internet connection is alive.

    If you don’t have an internet connection to download an update, the application will still start with the obsolete version stored in the smartwatch memory.

    Countries covered by the airports and navaids map

    At the time this manual is written, the map covers the following countries (alphabetical order):

    albania
    algeria
    angola
    argentina
    armenia
    australia
    austria
    azerbaijan
    bahrain
    belarus
    belgium
    benin
    bosnia and herzegovina
    botswana
    brazil
    bulgaria
    cambodia
    cameroon
    canada
    chile
    china
    colombia
    costa rica
    croatia
    cuba
    cyprus
    czech republic
    denmark
    dominica
    dominican republic
    ecuador
    egypt
    el salvador
    estonia
    finland

    france
    gambia
    georgia
    germany
    ghana
    gibraltar
    greece
    grenada
    guadeloupe
    guatemala
    guernsey
    guinea
    guineabissau
    guyana
    haiti
    honduras
    hong kong
    hungary
    iceland
    india
    indonesia
    ireland
    isle of man
    israel
    italy
    jamaica
    japan
    jersey
    kazakhstan
    kenya
    korea
    kuwait
    lao peoples democratic republic
    lebanon
    lesotho
    liberia

    liechtenstein
    lithuania
    luxembourg
    macedonia
    madagascar
    malawi
    malaysia
    malta
    martinique
    mauritania
    mexico
    moldova
    monaco
    montenegro
    morocco
    mozambique
    myanmar
    namibia
    netherlands
    new caledonia
    new zealand
    niger
    nigeria
    norway
    oman
    papua new guinea
    peru
    philippines
    poland
    portugal
    puerto rico
    qatar
    romania
    russian federation
    saint barthlemy

    saint kitts and nevis
    saint lucia
    saint pierre and miquelon
    saint vincent and the grenadines
    saudi arabia
    senegal
    serbia
    sierra leone
    singapore
    sint maarten dutch part
    slovakia
    slovenia
    south africa
    spain
    swaziland
    sweden
    switzerland
    taiwan
    tanzania
    thailand
    togo
    tunisia
    turkey
    ukraine
    united arab emirates
    united kingdom
    united states
    venezuela
    viet nam
    virgin islands
    zambia
    zimbabwe

    The flight parameters

    Position

    The position of the aircraft is determined by the coordinates provided by the location of the watch.

    This information must be available for the application to work. If this information is not available, the message “No location…” will appear on the navigation view.

    It is recommended to connect the watch to your phone with bluetooth, and activate GPS on the phone to have the best sensor performance. In standalone mode (no bluetooth connection), the GPS of the Samsung Gear Watch takes a lot of time to compute the current position. This may generate high latency in the PgW Nav app. With bluetooth on, the GPS of the cellphone provides accurate data to the app with a good performance.

    Ground speed

    The ground speed of the aircraft is provided by the GPS of the watch. It is not your airspeed. It is expressed in knots by default (can be changed. See Changing the units).

    This information is not mandatory for the application to work. If this information is not available, the estimated time to destination won’t be available.

    Heading

    The heading of the aircraft is provided by the GPS of the watch. It can be a magnetic heading or a true heading depending on your current North reference setting.

    This information is not mandatory for the application to work. If this information is not available, the heading won’t be available. Wind indication relative to the aircraft on the METAR page won’t be correct.

    Altitude

    The altitude of the aircraft is provided by the GPS or the barometer of the watch. It is expressed in feet by default (can be changed. See Changing the units).

    The settings menu

    The settings menu can be opened by swiping gently the navigation view from the bottom to the center with your finger.

    The menu is composed of up to 5 circles.

    The top and bottom circles are used to select a topic in the menu:

    • RMI mode
    • NAVAID names display
    • Moving ground map theme
    • METAR map display
    • North reference
    • Time reference (local or UTC)
    • Visibility of many ground map elements such as : major roads, minor roads, railways, land use, terrain elevation
    • Color of the flight parameters
    • Units for temperature, distance, visibility, altitude, speed and pressure

    Just tap one of these circles to select a topic.

    The name of the topic is displayed on the right circle.

    The current setting value for the selected topic is displayed on the left circle (the black one). Tap this circle to change the value.

    Tap the center circle to exit the menu.

    Airport information pages

    Overview

    The following information is provided in dedicated pages:

    • The list of radio frequencies
    • The current weather report
    • The weather forecast
    • The weather during the last hours past
    • The runways axis display for course selection (HSI in GOTO mode)

    All the pages have the same header giving the following information:

    • Code and name of the airport
    • The distance from your aircraft and the bearing

    When an airport is restricted, a small red sign is displayed. The airport symbol is colored in red :

    When you tap the airport code, you can see the location data page. This page gives the following information:

    • GPS coordinates of the airport
    • Altitude
    • Sunset and Sunrise times

    The units for the distance and the altitude can be changed (See Changing the units).

    The description of each page is given in the following chapters.

    Radio communication frequencies

    This page lists the radio communication frequencies to use to contact the airport services.

    Frequencies are given in MHz with their names.

    If the list of frequencies is too long to fit the screen, the list can be scrolled with your finger.

    Pressing the GOTO button on this page will activate the GOTO mode without any course (see section GOTO without course)

    METAR

    The meteorological information is provided by Aviation Weather Center (NOAA). The data is loaded when you request an information based on this and when the application cache contains only obsolete data.

    For Australian airports, when the messages are not available on the NOAA database, the messages are taken from the Australian Bureau Of Meteorology. This feature is no more available. Check out the post Australian METAR and TAF not available.

    This page gives a decoded and graphical representation of the latest METAR downloaded by the application.

    The application downloads a METAR if one of the following conditions is met:

    • No METAR data has been downloaded for the current airport
    • The downloaded METAR data is deprecated.

    The application automatically invalidates the latest METAR cache memory 30mn max after the time of its publication.

    The application will automatically try to download a new METAR message every minute until a valid METAR message is received.

    This feature requires an internet connection. It can use either a direct WIFI connection or the 4G/3G connection of your smartphone through bluetooth.

    The airport must provide a METAR message to have the weather report. Otherwise, the following message is displayed: “No message”

    Here are some examples of METAR pages with their associated METAR message:

    The page shows the following information:
    • The visibility. Value is in meters (can be changed. See Changing the units). ‘9999’ is displayed if the visibility is greater or equal to 10kms and unit is km. In the background, clouds appear from the right side of the screen if visibility is lower than 9kms. The more the background is cloudy the less the visibility is good.
    • The cloud layers. Each layer is displayed from the left (the lowest layer) to the right (the highest layer) on the same band. The horizontal position of the layer in the band is relative to the layer height in feet. Each layer contains the coverage factor (FEW,SCT,BKN,OVC) and the cloud base in feet above the ground level. A red line starts a layer when the coverage is equal to BKN or OVC.
    The keyword ‘TCU’ appears on the left of the band when the METAR raw message contains ‘TCU’.
    • The weather is described in a coded way into the white box on the left with the QNH value expressed in hPa by default (unit can be changed. See Changing the units). The coding is the one of the raw message. Under the box, two keywords may appear : TEMPO, BECMG.
      They are shown if the raw message contains the keywords. Tap the box with your finger to read the raw message (see below).
    • The wind is shown graphically over the airport symbol with its QFU. The arrow gives the direction of the wind. The barbs give the strength of the wind in knots.
      The barbs are displayed using the same rules as the WINTEM chart.

      The angle reference can be either the true north or the aircraft heading. Tap the graph to swap from one reference to another.
      The white small symbol over the graph shows the current reference.

    • The temperature and the dew point are shown in degrees Celsius (unit can be changed. See Changing the units). The temperature is on top.

    Finally, the raw message can be seen on the page by tapping the weather box. Examples:

    Tap the message to hide it.

    When the message is too long to fit the screen, it scrolls automatically. You can control manually the scrolling by turning the bezel of your watch and move the message up or down.

    TAF-on-WHEEL

    The meteorological information is provided by Aviation Weather Center (NOAA). The data is loaded when you request an information based on this and when the application cache contains only obsolete data.

    For Australian airports, when the messages are not available on the NOAA database, the messages are taken from the Australian Bureau Of Meteorology. This feature is no more available. Check out the post Australian METAR and TAF not available.

    The third information page is the weather forecast decoded from the TAF message.

    The application downloads a TAF if one of the following conditions is met:

    • No TAF data has been downloaded for the current airport
    • The downloaded TAF data is deprecated.

    The application automatically invalidates the latest TAF cache memory 2h max after the time of its publication.

    The application will automatically try to download a new TAF message every hour until a valid TAF message is received.

    This feature requires an internet connection. It can use either a direct WIFI connection or the 4G/3G connection of your smartphone through bluetooth.

    The airport must provide a TAF message to have the weather forecast. Otherwise, the following page appears: “No message”

    The TAF content is displayed in a very efficient and innovative way called TAF-on-WHEEL: the weather forecast is decoded hour by hour from the TAF message. Each hour
    is displayed in a sector of 60 degrees placed on a rotating disc. Use the rotating bezel of your watch to turn the disc:

    • Turn clockwise to see the next hours.
    • Turn counter-clockwise to see the previous hours.

    The TAF header shows the TAF publication date and time and forecast period (start datetime and the end time. If the end time is not for the same day, the number of days is displayed in the header. For example, the indication ‘+1d’ means that the end time is for the day after the start date of the forecast).

    The wheel is automatically rotated to show the current UTC time segment.

    Each sector is composed of several parts (from the center to the border of the disc):

    • The visibility: A digit gives the visibility in thousands of meters. A ‘+’ indicates a visibility greater than 10kms. The background color changes with the visibility: blue means a good visibility, gray means visibility is poor.
    • The cloud layers: Up to 4 layers are shown. Each layer is given with the coverage level (FEW,SCT,BKN,OVC) and the clouds base in feet above ground level. The background color depends on the coverage level: blue for FEW, white for SCT, gray for BKN and dark gray for OVC.
    • The weather: shown in the coded format directly taken from the raw message. TEMPO, BECMG and PROB flags are displayed too.
    • The flight category and the wind. The wind speed is expressed in knots. The background color depends on the flight category.

    Start time and end time of the sector are displayed at the border of the disc.

    If the TAF contains BECMG and/or TEMPO segments, the weather may vary during some hours. In this case, the different weather conditions applicable to the same hour
    are displayed alternatively on the same sector.

    METAR EVOLUTION

    The next information page displays the METAR evolution during the past hours. The following parameters are displayed on separate charts :

    • Cloud base
    • Visibility
    • Pressure
    • Temperature and dew point
    • Wind speed, direction and gusts

    You can see the chart you want by tapping the corresponding symbol on top of the chart or you can turn the bezel of your watch.

    The METAR data used to draw the charts is not stored on your watch but is taken directly from the NOAA website. So this feature is available even if the app was not running during the past hours.

    This feature requires an internet connection.

    COURSE SELECTION

    The fourth page displays on the same graphic the magnetic orientation (QFU) of the runways of the airport. The orientation can be relative to :

    • The true north
    • The current aircraft heading
    • Any orientation (course like the OBS of the HSI)

    Just tap the center of the graphic to switch between these modes.

    When the orientation is relative to the current aircraft heading, the graphic is dynamically updated as the heading changes.

    When the orientation is relative to the OBS value, turn the wheel of your watch to change the OBS value. Graphic will turn automatically.

    Each runway has a blue label with the value of the magnetic orientation inside. The runway number is displayed on the graphic.

    The graphical orientation of the runways on the map and in the runways axis page takes into account the magnetic variation. The magnetic variation is provided by the airport map data so the internet connection is not required for this graphical display of the runways. It is computed using the NOAA magnetic field calculator.

    The value of the magnetic variation is displayed on the top right of the graphic, below the reference symbol (“true north” or “aircraft heading” or “OBS value”).

    Parallel runways are NOT managed. The app only shows the orientation.

    By tapping the label of a runway, you will select the runway as your course and activate the GOTO mode with the HSI (see GOTO with course). It will highlight the axis of the selected runway on the navigation view.

    By tapping the OBS value, you will select the value as your course and activate the GOTO mode with the HSI (see GOTO with course). It will highlight the axis of the selected course on the navigation view.

    A yellow arrow with the value of the magnetic orientation of the runway (or the OBS value) will be displayed on the navigation view. The arrow points the center of the GOTO destination and is oriented with the true north orientation of the selected runway axis.

    When a course is selected and GOTO is active, the active course value is displayed with a magenta background.

    WARNING ! The GOTO function can’t be used as a localizer. The GPS reference for the computation of the CDI position is the GPS location of the airport; it is NOT the GPS location of the runway centerline.

    Navaid information pages

    Overview

    The pages give the following information:

    • ID and name of the navaid
    • The location of the navaid and its altitude above mean sea level
    • The sunrise (SR) and sunset (SS) times computed using the current date and the navaid location
    • The distance from your aircraft and the bearing
    • The radio frequency
    • The type of navaid : VOR, VOR-DME, NDB
    • The range
    • The course to get to the navaid (QDM)

    The 3 first topics are displayed on the top of all the navaid information pages. Location of the navaid and sunrise/sunset are displayed alternatively every 3 seconds.

    The presentation of the data and the buttons used to change the page work like the ones defined in the airport information pages.

    Radio communication frequencies

    This page gives the radio communication frequency to set in order to use the navaid with the traditional instrument of your aircraft.

    Frequency is given in MHz for VOR, VOR-DME. It is given in KHz for NDB.

    The frequency is provided with the range in Nm and the type of navaid :

    • VOR
    • VOR-DME
    • NDB

    The page contains also one or two buttons to activate one RMI pointer on the selected navaid. Buttons are visible only when the RMI function is activated in the settings menu.

    Course selection for navaid

    This page shows a graphical view of the route you can use to get to the navaid.

    Turn the bezel of your watch clockwise or counter-clockwise to turn the route and change the course value (displayed on the right).

    The view shows the FROM and TO sectors of the route. So you can clearly see what will be the indicator on the instrument.

    The relative position of your aircraft and its heading are displayed on the view.

      The page contains also one “GOTO” button to activate the GOTO function with the selected course and navaid. 

      The button is named “NOGO” when the GOTO function is already active for this navaid. Press the button to stop the GOTO function.

      When the route goes through your position and the selected navaid, you found the QDM to the navaid. A blue circle is then displayed below the aircraft symbol.

      Select this route to go to the navaid directly.

      RMI function

      The RMI function can be activated in the settings menu. The function has 2 modes:

      • Single pointer: you can select only one navaid. Only one pointer is displayed on the navigation view.
      • Dual pointer: you can select 2 navaids. Up to two pointers are displayed on the navigation view.

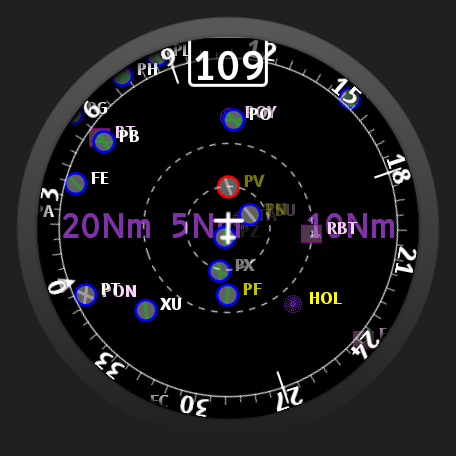
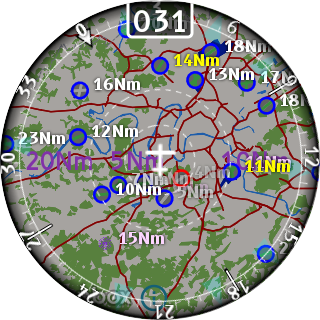
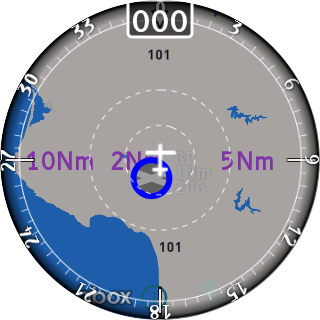
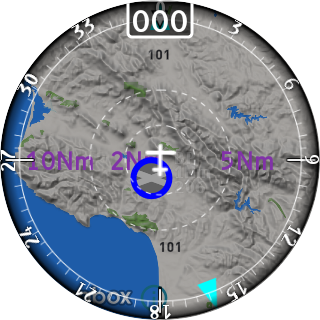
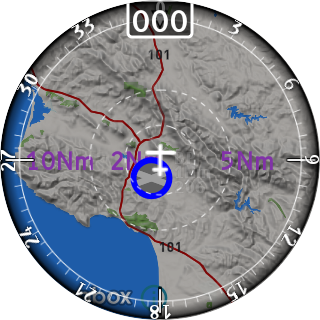
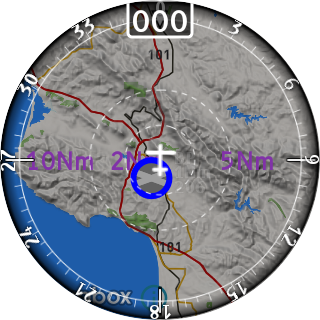
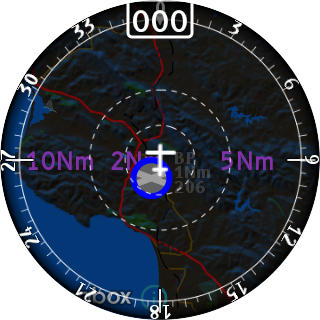
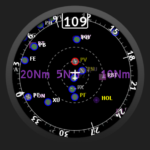
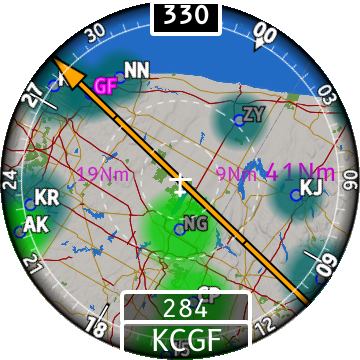
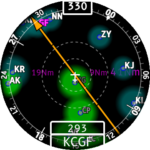
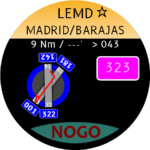
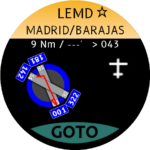
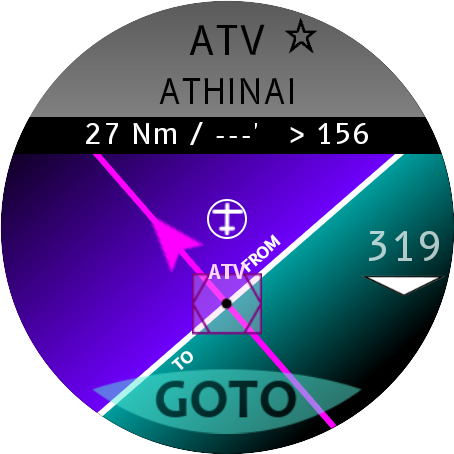
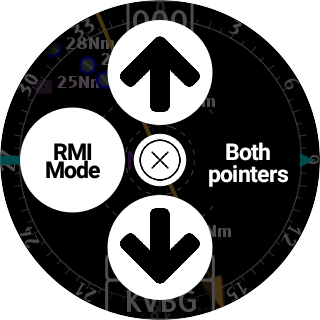
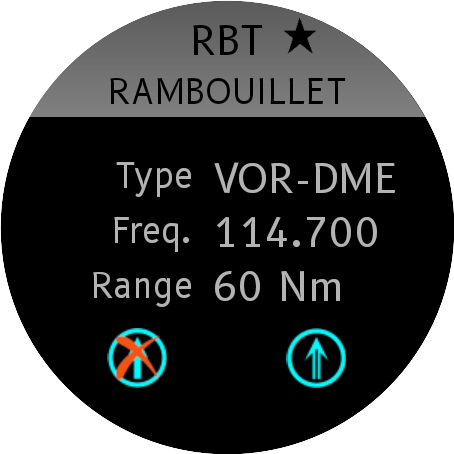
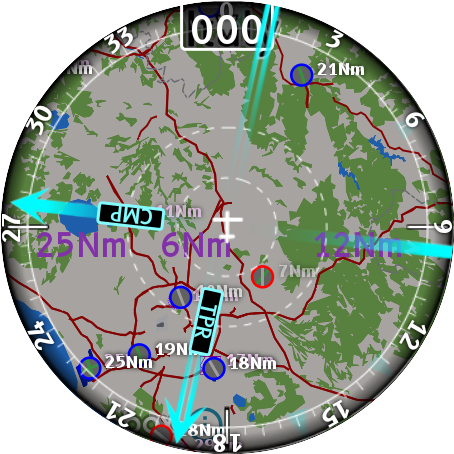
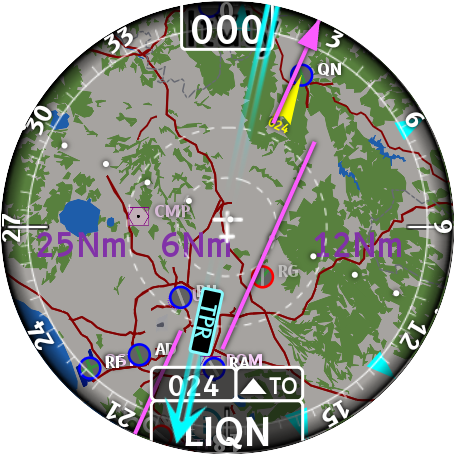
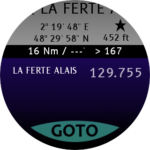
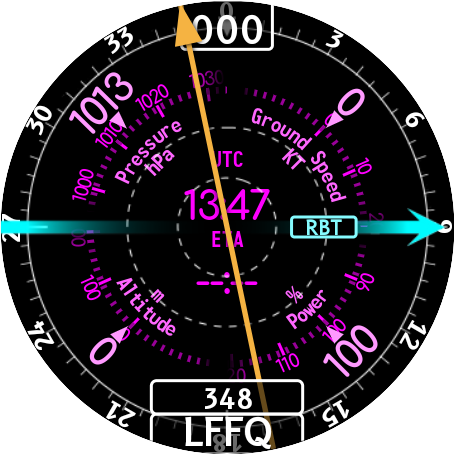
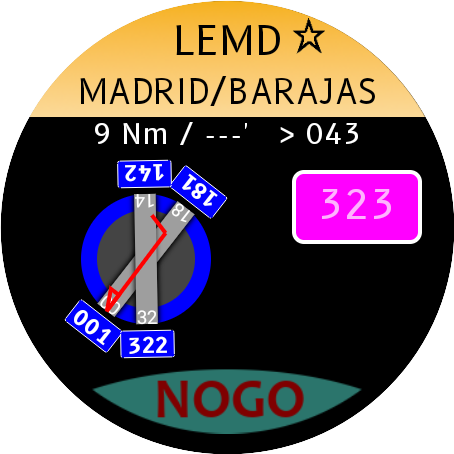
      Note that no pointers are displayed when no navaids have been selected. The selection of a navaid is done on the radio frequency page of this navaid.

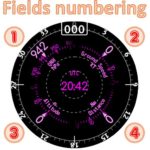
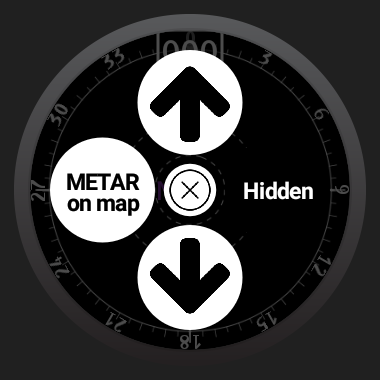
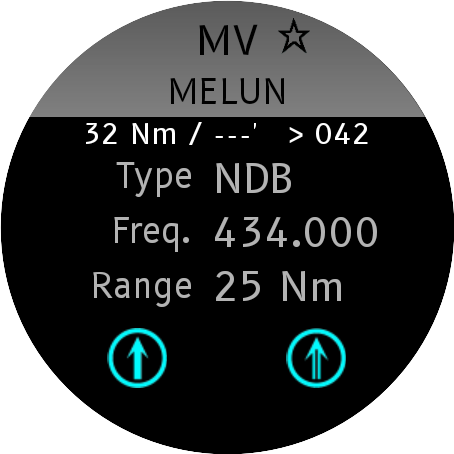
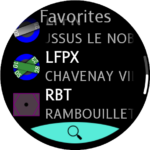
      Depending on the selected mode, one or two buttons are displayed on this page. 

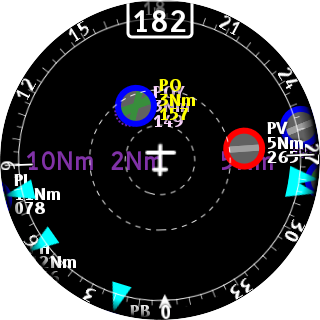
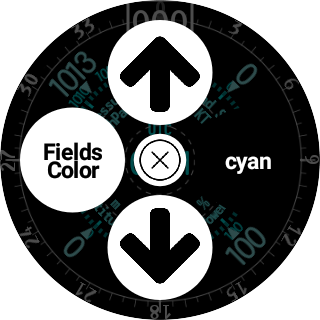
      Tap one button to link the corresponding pointer to the navaid. If the pointer is already linked to another navaid, the button is magenta. Otherwise, it is cyan. If you select this pointer when it is magenta, the link with the other navaid will be removed automatically.

      When the navaid is already linked to a pointer, the button of this pointer has a red cross and can be tapped to remove the link and hide the pointer.


      Buttons to set a pointer
      Button to remove a pointer
      Magenta button means that the pointer is linked to another navaid
      Dual pointers
      Single pointer

      You can tap at any time a pointer to open the navaid information page related to it.

      The pointer has a label which shows the ID of the linked navaid.

      Manage your favorite items (airports and navaids)

      You can declare your favorite airports and navaids by simply tapping the “star” button on the right of the header of the page.

      The star is filled when the airport (or the navaid) is in your favorites list. Otherwise, it is empty.

      Tap the “star” button when it is filled to remove the airport (or the navaid) from the list.

      Your favorites list can be opened at any time from the navigation view by the screen from right to left.

      If the list is greater than the screen, use your finger to scroll the list up and down.

      Just tap one of the items to directly open the airport (or navaid) information page.

      Swipe the screen from left to right to close the favorites list and return to the navigation view.

      The selection of an airport (or navaid) in the favorite list doesn’t move the navigation view to this airport (or navaid). The navigation view is always linked to the current GPS location.

      Direct access with smart keyboard

      You can enter the code of any airport available in your current map or the ID of any navaid available in your current map.

      The smart keyboard can be opened at any time from the navigation view by double-tapping the screen.

      If you have favorites, tap the center button named “See most recent” (if your recent list is not empty) then the button “Enter new code”.

      The smart keyboard is composed of

      • 26 buttons spread all around the screen for the letters,
      • 10 buttons for the numbers,
      • one field where the code is displayed as you enter letters,
      • one red button to cancel the latest letter
      • and one button named “Cancel” to directly return to the navigation view.

      To select a letter, you can tap any button or turn the bezel of your watch and tap the big letter on the top.

      The keyboard is smart because it activates only the letters which are available in the current airport and navaid map for the next character of the code to enter. White buttons contain available letters. Black buttons contain unavailable letters. When there are no choices for a character of the code because only one letter matches, the keyboard selects this unique letter and ask for the next letter. Note that if there are still no choices for the next characters, it repeats the automatic selection of the letter till the end of the code or the next multiple choice.

      When the letters match a known code, the field becomes green. Just tap this field to confirm your input. It will open directly the airport (or navaid) information page for this code.

      The GOTO function

      GOTO without a course (ADF behaviour)

      This function highlights the airport of your choice in the navigation view. An orange arrow appears in this view. It aims the selected airport like an ADF pointer (but using GPS coordinates).

      The airport bearing and code are displayed at the bottom of the navigation view. You can tap the code to open directly the airport information page.

      The GOTO function without course can be activated at any time by tapping the ‘GOTO’ button on the frequencies page of any airport.

      When it is activated, this button is transformed into a ‘NOGO’ button to cancel the GOTO function.

      If you activate the GOTO for an airport which is not the current GOTO destination, it becomes the new GOTO destination. No need to cancel the previous GOTO to activate a new one.

      When GOTO is activated, a new indicator is available in the background of the navigation view: the estimated remaining time to destination (ETA). It gives in minutes the duration of the flight from your current position to the airport at the current speed. This information requires the speed to be available otherwise it shows “–:–“

      The GOTO button of the radio communication frequencies page activates the GOTO mode without CDI on the navigation view. The arrow will simply point the destination. To get the CDI feature, use the GOTO button of the course selection page or choose a course in this page.

      The GOTO function adds a new layer in the navigation view when the rotating bezel of your watch is used. When the land map is OFF, if you continue to turn the bezel clockwise when the view range is 5Nm, the airport map will fade out and only the GOTO arrow will be visible. It is quite easy to read !

      GOTO mode with a course selected (HSI behavior)

      When you select a course with the course selection page (see course page), the arrow is magenta and is composed of a segment which can shift to the left or to the right depending on the current aircraft deviation from the selected course: it is the course deviation indicator (aka CDI). It behaves like a HSI. White dots are displayed to give you the deviation scale. Each dot is 2 degrees of deviation. The full scale is 10 degrees on each side of the course.

      Change the course from the navigation view

      At the bottom of the navigation view, in addition to the destination code, 2 more fields will be displayed:

      • the selected course
      • the FROM/TO flag

      You can change the course by turning the bezel of the watch. Just double-tap the screen to activate the course change.

      Tap the destination name at the bottom of the screen to validate the new course value.

      Go back to the page of the current destination

      By tapping the ICAO code of the GOTO destination at the bottom of the navigation view, you will directly open the “course select” page for the destination (airport or navaid).

      Course selection page of an airport
      Course selection page of a navaid

      In the course selection page, the selected course will be highlighted with a label having a magenta background (it can be a runway or the OBS value).

      You can change the course by tapping a new runway in the graphic.

      You can also cancel the GOTO mode by tapping the bottom button “NOGO”.

      Changing the units of measures

      The unit of some measures can be changed to fit your regional units. Go to the settings menu to change the units.

      The selection of the unit is applicable to the following measures:

      • distances,
      • altitude,
      • temperatures in METAR page
      • pressure in METAR page
      • visibility in METAR page
      • speed